How to set up Geofencing on the Tapo/Kasa App
Door recente updates is de toegang tot genoemde functie(s) in deze FAQ mogelijk uitgebreid. Ga naar de ondersteuningspagina van uw product, selecteer de juiste hardwareversie voor uw apparaat en controleer de sectie Gegevensblad of Firmware voor de laatste verbeteringen die aan uw product zijn toegevoegd. Let op: De productbeschikbaarheid verschilt per regio en sommige modellen zijn mogelijk niet beschikbaar in uw regio.
Introduction
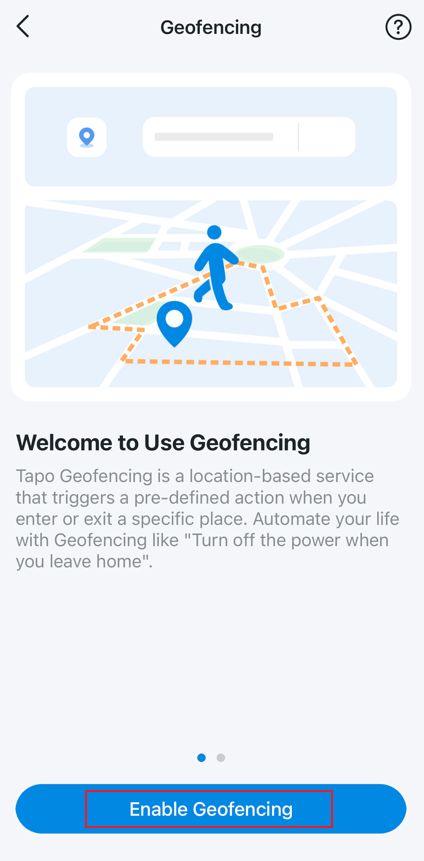
Geofencing is a location‑based feature that defines a virtual boundary around a specific area. When your mobile device enters or leaves this boundary, a predefined action is automatically triggered—for example, turning off power when you leave home. For more information, see General Questions about Tapo/Kasa Geofencing.
Configuration
The following steps use the Tapo app as an example.
Step 1. Enable Precise Location permission for the Tapo/Kasa app.
Note: To support location‑based Geofencing Smart Actions, Tapo/Kasa requires “Allow all the time” location permission. Once enabled, the app can receive location updates even when running in the background.
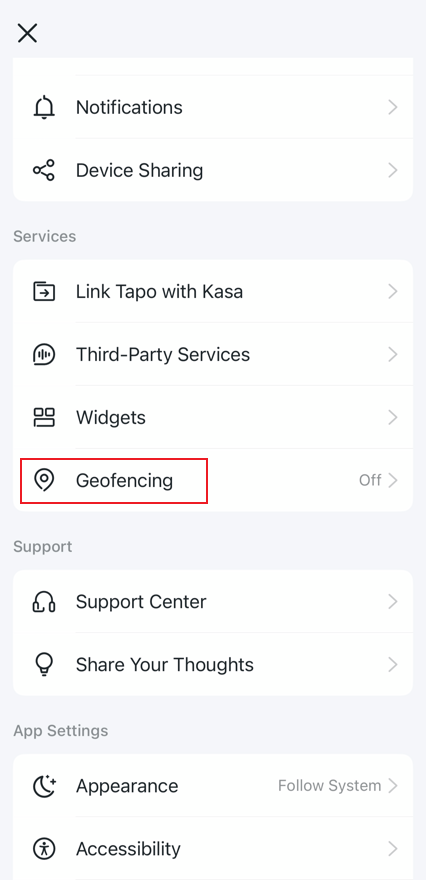
Step 2. Open the Tapo/Kasa app and go to Me > Geofencing, then tap Enable Geofencing. Note that the location of the Me button in Tapo app may vary by app version. It is located either in the bottom‑right corner or the top‑left corner of the app.
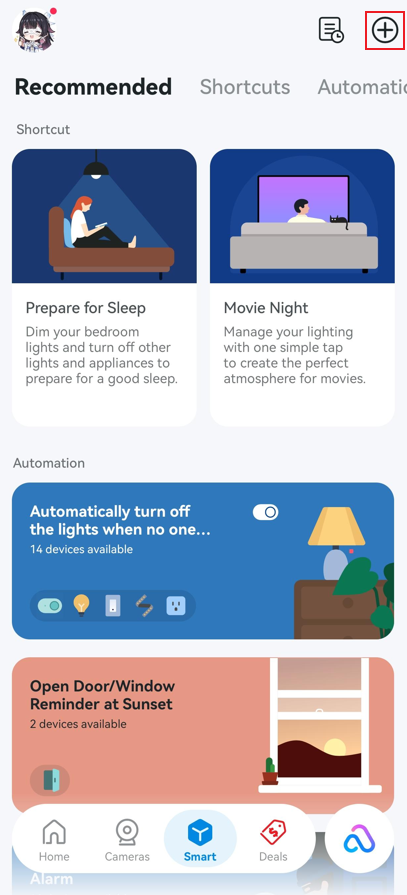
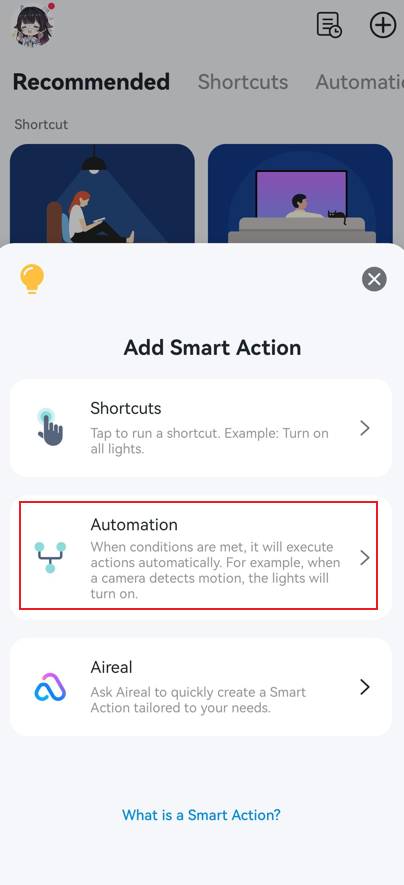
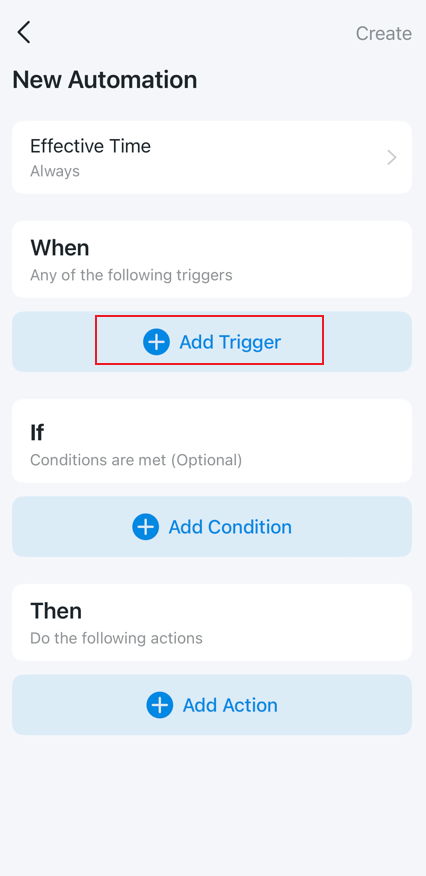
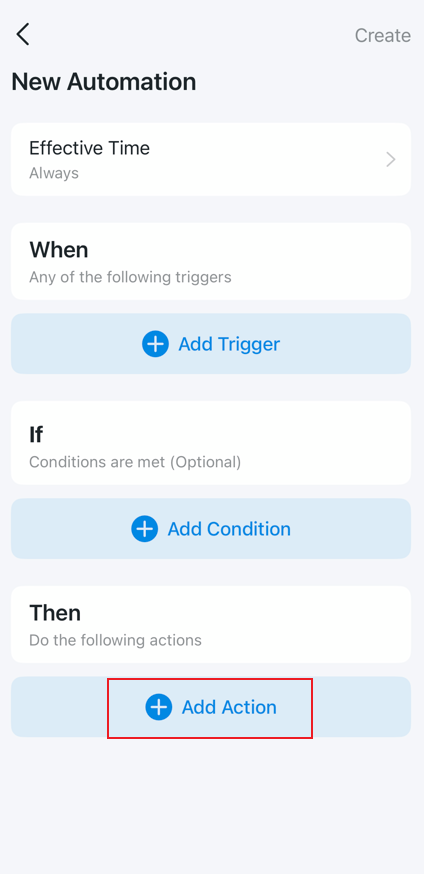
Step 3. Go to Tapo/Kasa app Smart tab, tap the Plus icon in the top‑right corner, and select Automation.
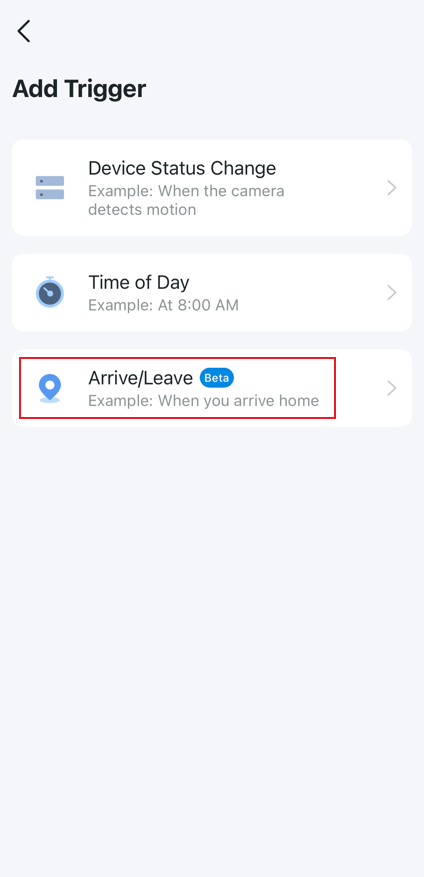
Step 4. Tap Add trigger > Arrive/Leave.
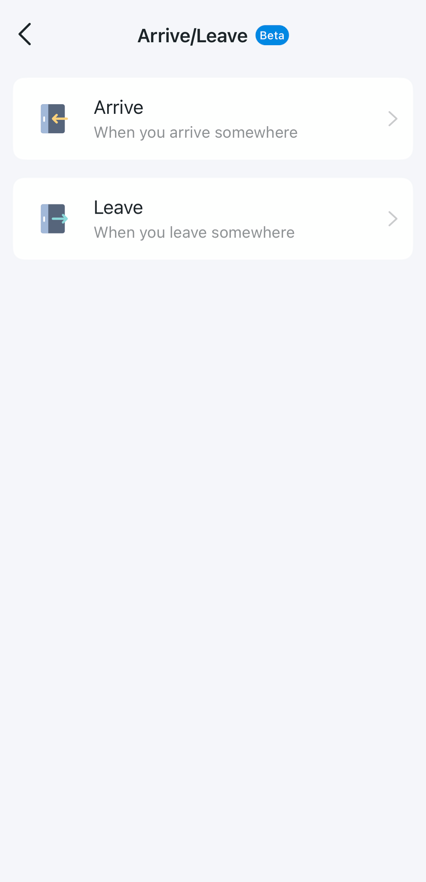
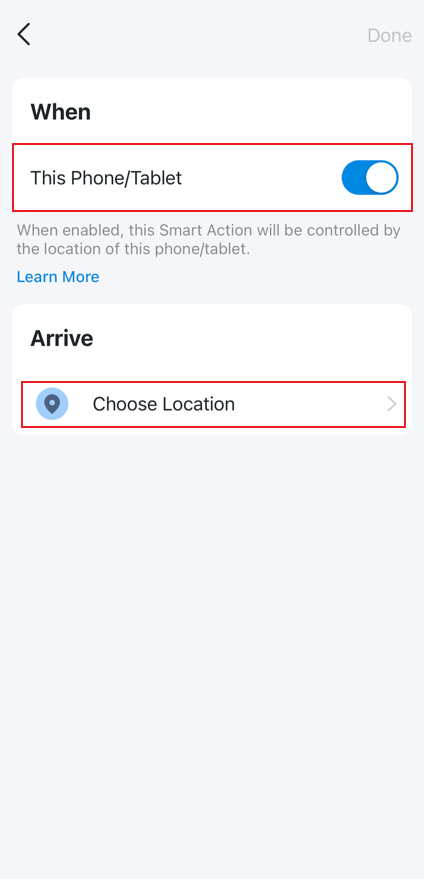
Step 5. Select Arrive or Leave, enable This Phone/Tablet, then choose a location by setting the map coordinates and effective radius. Tap Done in the top‑right corner.
Note: Ensure This Phone/Tablet is enabled; otherwise, the Geofencing Smart Action will not work. If multiple devices are used with the same owner account, enable This Phone/Tablet for each device in the corresponding Smart Action rule to allow each device to trigger the action when entering or leaving the designated location.
Step 6. Tap Add Action and select the desired action (for example, turn on living room light). Set the Effective Time, then tap Create in the top‑right corner.
Get to know more details of each function and configuration, please go to download center to download the manual of your product.